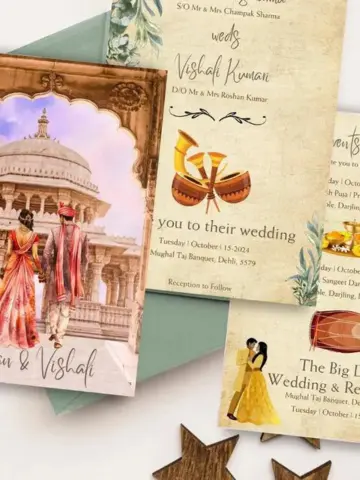
Your wedding invitations are the first glimpse your guests will have of your special day,
setting the tone for the celebration to come. Designing and creating your wedding
invitations can be a delightful and personalized experience. From choosing the right
colors and fonts to crafting the perfect wording, every detail matters. To help you
through the process, we have put together a step-by-step guide to creating wedding
invitations that will impress your guests and reflect your unique love story.
Step 1: Set Your Theme and Style
Before diving into the creative process, decide on the overall theme and style of your
wedding. Whether it’s classic and elegant, rustic and whimsical, or modern and
minimalist, your wedding invitations should align with the chosen theme. This will serve
as the foundation for all design decisions.
Step 2: Choose the Right Colors and Fonts
Select a color palette that complements your wedding theme and reflects your
personalities. Stick to two or three main colors to maintain a cohesive look. Similarly,
choose fonts that match the overall style – elegant scripts for a formal affair, playful
fonts for a fun celebration, and clean fonts for a modern wedding.
Step 3: Gather the Necessary Information
Compile all the essential details to be included in the invitation. This typically includes
the names of the hosts, the couple’s names, date, time, venue, and RSVP information.
Double-check for accuracy and spelling before moving forward.
Step 4: Design the Invitation Layout
Decide on the layout of your wedding invitation. Will it be a traditional folded card, a flat
card, or a unique shape? Consider incorporating design elements like borders, motifs,
or illustrations that resonate with your theme.
Step 5: Add Personal Touches
Make your invitations more personal by adding special touches. Include a meaningful
quote, a custom monogram, or a symbol that represents your relationship. These
elements will make your invitations truly unique.
Step 6: Craft the Wording
The wording of your wedding invitation sets the tone and formality of the event. Choose
your words carefully and ensure they reflect the style of your wedding. If you need
inspiration, look up traditional invitation wording or seek guidance from a professional
stationer.
Step 7: Create RSVP Cards and Envelope
Design RSVP cards that match the style of your invitations. Include pre-addressed and
stamped envelopes to make it convenient for your guests to respond. This will help you
manage your guest list and plan accordingly.
Step 8: Select Quality Paper and Printing
Choose high-quality paper that complements your design and fits within your budget. Opt for printing techniques like letterpress, foil stamping, or digital printing, depending on your preferences and budget.
Step 9: Proofread and Review
Before finalizing your wedding invitations, carefully proofread all the details, including dates, names, and addresses. Get a second pair of eyes to review as well to avoid any oversights. A Step-by-Step Guide to Creating Wedding Invitations 3
Step 10: Assemble and Send
Once your invitations are printed and ready, assemble them with care. Include all the necessary enclosures, such as RSVP cards and additional information cards. Address the envelopes neatly or consider hiring a calligrapher for an elegant touch. Send out the invitations well in advance, allowing your guests ample time to RSVP. Conclusion: Creating your wedding invitations is a joyous and rewarding process that allows you to express your style and personality. By following this step-by-step guide, you’ll craft invitations that not only impress your guests but also set the perfect tone for your special day. Remember to enjoy the journey and cherish the moments as you prepare to embark on your beautiful journey together. Happy wedding planning.